
Open the PDF, tap the Markup icon, tap Add Signature, draw with your finger, and place it. That's it. Apple's built-in Markup tool is the fastest way to sign a document on an iPhone, and most people finish in less than a minute.
You'll find Markup waiting inside apps you already use:
- Files — open any PDF and tap the pencil icon
- Mail — preview an attachment, then tap Markup
- Safari — use the share sheet after downloading a PDF
- Photos and Notes — edit mode surfaces the same signature tool
If you'd rather type your name instead of drawing it, or need to combine signing with other edits like cropping or adding text, a browser-based tool like FlowPDF handles that locally, without uploading your file anywhere.
Key Takeaways
Signing a PDF on iPhone takes under a minute with Apple's built-in Markup tool, while browser-based options like FlowPDF add typed signatures and local, upload-free editing.
| Point | Details |
|---|---|
| Use Markup for speed | A drawn signature through Files, Mail, or Safari typically takes under 60 seconds, no app needed. |
| Duplicate before signing | Copy important PDFs first so an editing mistake never touches the original file. |
| Watch the Photos/Notes revert trap | Signatures added in Photos or Notes can disappear if you tap Revert later. |
| Reserve e-sign apps for complex cases | Multi-signer contracts and audit trails need a dedicated app, not Markup alone. |
| Choose FlowPDF for local, combined edits | FlowPDF signs and edits PDFs in the browser with no upload, no subscription, and no watermark. |
Table of Contents
- How to sign a PDF on iPhone with Markup
- Signing from Safari, Mail, Notes, and Photos
- When Markup isn't enough: dedicated e-sign apps
- Saving and sharing your signed PDF without losing the signature
- Fixing the most common iPhone PDF signing problems
- Apple Pencil vs. finger: which gives a better signature?
- Markup vs. other iOS signing apps: what actually differs
- Practical shortcuts and common pitfalls
- FlowPDF: sign and edit PDFs privately, right in your browser
- Sources
How to sign a PDF on iPhone with Markup
The exact button layout shifts slightly depending on whether you're in Files, Mail, or Safari, but the core sequence is identical everywhere. Once you've done it once, it becomes muscle memory.
- Open the PDF. Tap it in Files, or open the attachment preview in Mail.
- Tap the Markup icon. It looks like a pencil tip inside a small circle, usually in the top right corner of the screen.
- Tap the plus button (+), then choose Signature. This opens a small drawing pad along with any signatures you've saved before.
- Draw your signature with your finger. Use the full width of the pad for a natural look. If you mess up, tap Clear and try again.
- Tap Done to drop the signature onto the page.
- Drag and resize it. Pinch to scale, then drag it into position over the signature line.
- Tap Done again to exit Markup mode.
- Save the file. You'll typically see options like Save File To or Share. Choose where the signed copy should live.
Here's the quick mental checklist worth running before you close the file: open, markup, add signature, position, Done, save, verify. Skip the last step, and you risk sending an unsigned file without knowing it.
One detail trips up a lot of first-time users: Markup edits the file you opened. If that PDF is the only copy of an important contract, duplicate it in Files before you start (tap and hold, then choose Duplicate). That way, if you regret the placement or need a blank version later, the original is untouched.
Signatures you create in Markup aren't one-and-done, either. Apple syncs them through iCloud, so a signature you draw on your iPhone shows up automatically when you're signing a PDF on iPad or Mac, which saves you from redrawing your name every time you switch devices.
Pro Tip: Turn your phone sideways before you draw. The landscape drawing pad is roughly twice as wide, which makes your signature look far less cramped and more like your actual handwriting.
If the PDF has fillable fields, like a name, date, or checkbox, Markup can still add your signature on top, but it won't recognize or auto fill those interactive fields the way a dedicated PDF form filler does. For simple signature-only documents, though, Markup alone gets the job done.
Signing from Safari, Mail, Notes, and Photos
Where you open the PDF from changes a few small things about the workflow, mostly around how you save the result afterward.
Safari is the entry point most people forget about. When you download a PDF from a website, tap the share icon, then select Markup. After signing, use Save File To to send it into Files or iCloud Drive rather than leaving it buried in Downloads. This path matters most when a PDF arrives as a web download rather than an email attachment.
Mail lets you preview an attachment directly in the message thread, sign it with Markup, and tap Done. From there you can reply to the sender with the signed file attached, or save it to Files first if you want a backup copy before sending.
Notes and Photos technically offer a Markup path too, but they come with a catch. If you scan a document into Notes or mark up an image in Photos, tapping Revert later can strip out edits, including your signature, and return the file to its original state. Treat anything signed inside Photos as a draft until you've exported it somewhere permanent.
AutoFill occasionally appears when a PDF contains genuine interactive form fields rather than a static signature line. iOS may prompt you to fill in text fields automatically before you even reach the Markup step. That's a sign the document was built as a fillable form, and it's worth checking whether it also expects a typed name rather than a drawn signature.
When Markup isn't enough: dedicated e-sign apps
Markup handles the vast majority of everyday signing, but it has real limits once a document needs more than one signature or has to hold up legally under scrutiny.
Here's what Markup doesn't do:
- No audit trail showing who signed, when, or from what device
- No support for multiple signers on the same document
- No typed form fields with validation (name, date, checkbox logic)
- No identity verification tied to the signature
- No tamper-proof, flattened export that locks the signature into the file
If you're closing a corporate contract, handling anything that requires notarization, or collecting signatures from several people across different companies, a dedicated e-sign platform is the better tool. These apps add the paper trail that Markup was never designed to provide.
For everyday, single-party signing, though, installing a separate app is often overkill. Markup wins on speed precisely because there's nothing to download.
Pro Tip: If privacy matters as much as features, check whether the e-sign app processes documents on your device or routes them through a server first. Cloud-based signing tools often require an account and a file upload before you can do anything.
Saving and sharing your signed PDF without losing the signature
The signature itself is rarely the problem. Losing it after you've drawn it is the mistake that actually trips people up.
- Tap Done in Markup, then choose how to save: Save File To for Files or iCloud Drive, or the share icon for Mail, Messages, or AirDrop.
- Duplicate before you sign if the document matters and you're not fully sure about placement. A duplicate costs nothing and protects the original.
- Reopen the saved file before sending it. Confirm the signature is visible on the page, not just floating in an edit preview that never got saved.
- Choose your export path deliberately. Overwriting the original PDF in place is fine for casual documents, but for contracts, save the signed version under a new name.
Assuming the signature was sent, without actually checking, is one of the most common ways a signed document goes missing. Verify the saved copy opens correctly before you close the app.
Managing multiple saved signatures in Markup
Markup doesn't limit you to one signature. Tap the plus button in the signature tool and you'll see every signature you've saved, with the option to add another.
- Create a separate signature for business use and a shorter one for initials
- Tap the signature you need each time rather than redrawing it
- Delete an old or messy signature by tapping Edit in the signature list and removing it
- Update a signature by deleting the old version and drawing a fresh one
Keeping a clean, formal signature for contracts and a quick scribble for internal paperwork saves you from second-guessing which one to use on a given document. Since these sync through iCloud, the same set is available whether you're on your iPhone or working from an iPad later.
Why local processing matters for sensitive documents
Local processing means a file never leaves your device to reach a server. Nothing gets uploaded, stored remotely, or passed through a third party's infrastructure just to add a signature.
The safest way to sign a contract, tax form, or NDA is to keep the file exactly where it already is: on your device, not on someone else's server.
That's the appeal of a tool like FlowPDF, which handles signing and editing entirely in your browser, with no upload step and nothing to install.
- Signs, edits, crops, and merges PDFs directly in the browser
- No file upload, no account, no subscription
- No watermark added to the finished document
Reach for FlowPDF's sign tool when you want a typed signature instead of a drawn one, or when you need to sign and make other edits, like cropping a scanned page or adding text, in the same pass.
Fixing the most common iPhone PDF signing problems

Most signing failures on iPhone come down to one of a handful of repeat offenders, and nearly all of them have a fast fix.
Signature not appearing on the page. This usually means you tapped Done before dragging the signature into position, or the signature landed off-screen. Reopen Markup, tap the signature layer, and check if it's sitting outside the visible page boundary.
PDF won't save. If Save File To doesn't respond, the file may be open in a read-only preview rather than a proper Files location. Save a copy to Files first, then apply Markup to that copy instead of the original attachment.
Signature looks distorted or tiny. This happens when you resize by dragging a corner instead of pinching. Delete the signature and re-add it, then use two fingers to scale it proportionally.
Signed file reverts to blank. This is almost always the Photos and Notes Revert trap described earlier. Once you sign inside those apps, export immediately rather than leaving the file sitting there.
Attachment won't send after signing. Large scanned PDFs sometimes exceed a mail provider's size limit. Running the file through a PDF compressor before sending usually solves it without touching the signature itself.
Security concerns before sending. Avoid finishing a sensitive signature over public Wi-Fi, and double check the sender's email domain matches what you expect before opening any attachment that asks for a signature. If the document contains information you'd rather redact before sharing, do that pass before you sign, not after.
Apple Pencil vs. finger: which gives a better signature?
Either works, but they solve slightly different problems. A finger is faster to reach for and requires nothing extra. An Apple Pencil produces a signature that looks closer to your actual handwriting, with finer control over thickness and curve.
If you own an iPad with Apple Pencil support, that's genuinely the better hardware for signing anything you care about the appearance of, like a signature on a client-facing contract. The pressure sensitivity lets you replicate the natural taper of pen strokes that a finger tends to flatten into uniform lines.
On iPhone specifically, Apple Pencil support is limited (it works with some iPhone models paired to compatible accessories, but most iPhone signing happens by finger since the phone itself doesn't support Apple Pencil input the way iPad does). For the overwhelming majority of iPhone users, finger-drawn signatures in Markup are the only practical option, and that's fine. Nobody scrutinizes a signature on a delivery confirmation the way they might a mortgage document.
If your finger-drawn signature always comes out looking cramped or shaky, try widening the drawing area by rotating your phone into landscape mode first. The extra horizontal space alone fixes a lot of messy-signature complaints.

Markup vs. other iOS signing apps: what actually differs
Markup is a drawing tool bolted onto every PDF viewer in iOS. Third-party e-sign apps are built specifically around the act of collecting a legally defensible signature, and that difference shows up in a few concrete ways.
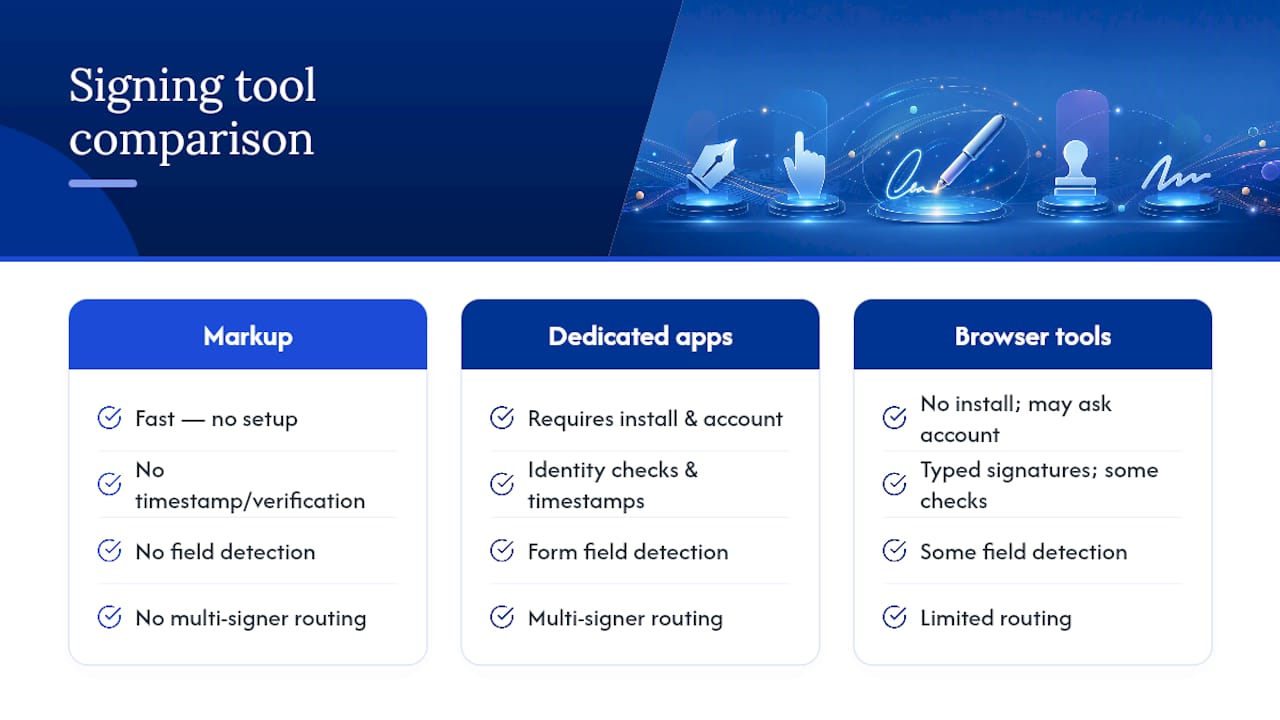
Markup gives you speed and zero setup: no account, no app download, no learning curve. What it doesn't give you is any record of the signing event itself. There's no timestamp tied to the signature, no verification that the person who drew it is who they claim to be, and no way to lock the signature so it can't be edited or removed later.
Dedicated apps flip that trade-off. They add identity checks, field detection for forms, multi-signer routing, and exportable audit trails, but that usually means creating an account, sometimes paying for a subscription, and often uploading your document to a cloud server to process it.
Browser-based tools sit in between those two extremes. A privacy-focused option like FlowPDF adds typed signatures and combined editing that Markup lacks, while still keeping the file on your device rather than sending it to a remote server. For most everyday PDFs, that middle ground covers what Markup can't without asking you to give up the privacy Markup already offers.
Practical shortcuts and common pitfalls
Duplicate the file before you sign anything you can't afford to redo. Reopen the saved copy afterward and confirm the signature is actually visible, not just placed in the preview. For anything sensitive, a contract, a lease, tax paperwork, favor tools that keep processing on your device rather than routing through someone else's server, ensuring privacy through anonymising PDFs to remove sensitive data. That's the gap between a signature that just looks done and one you can actually trust.
— Ronald Ang
FlowPDF: sign and edit PDFs privately, right in your browser
Markup handles a quick drawn signature well, but it stops there. If you'd rather type your name in a clean font, need to crop a scanned page, add text, or combine several edits with your signature in one pass, FlowPDF does all of it directly in your browser, without uploading the file anywhere.
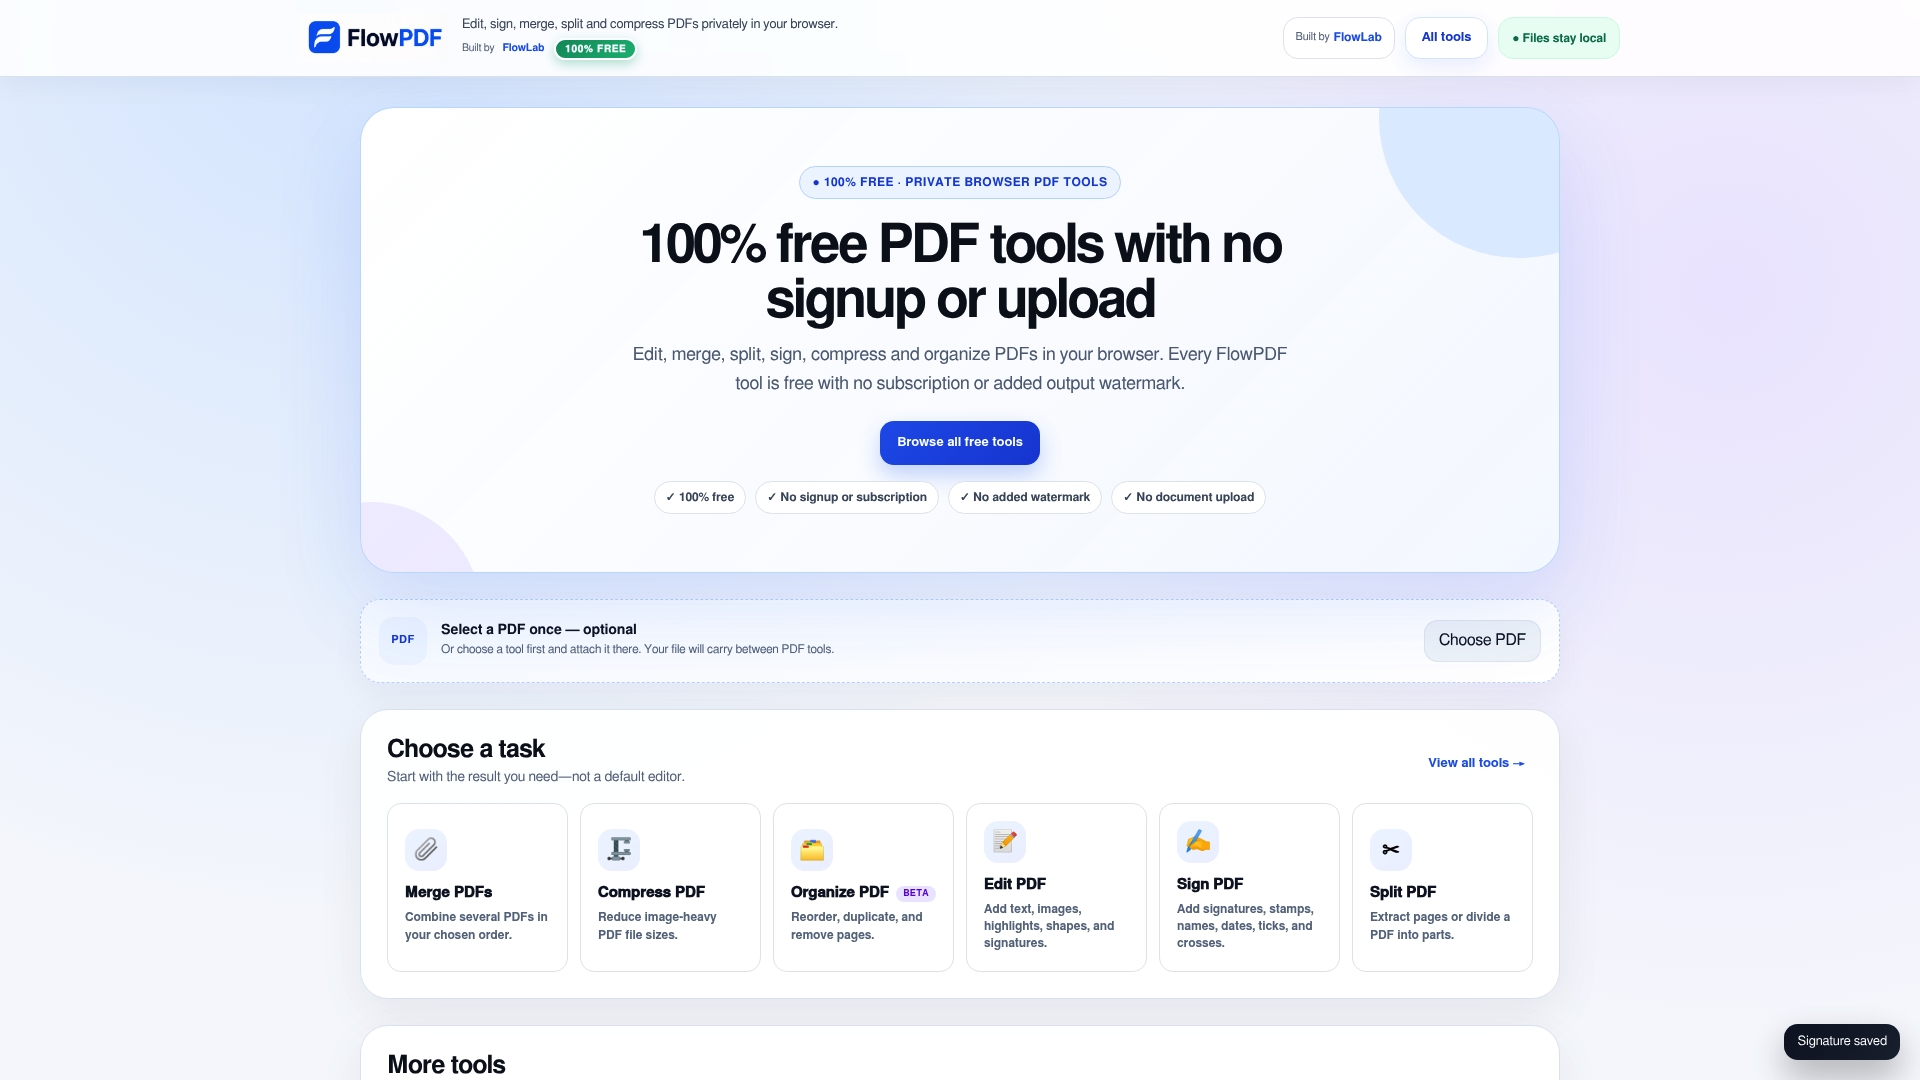
Every tool runs locally: your PDF never leaves your device, there's no account to create, and nothing gets a watermark slapped on it afterward. That matters most for the documents you'd least want sitting on an unknown server, leases, client contracts, tax forms, the kind of paperwork Markup can sign but not really finish editing. FlowPDF's sign PDF tool covers the signature itself, and the broader edit PDF toolkit handles cropping, text, and page organization in the same session. If you're already comfortable with Markup for a fast signature, try FlowPDF the next time you need to sign and edit a document at once, and see how much of that workflow now stays local.
Sources
Steps and sync details come from Apple Support's signing guide. Entry-point differences are covered by Make Tech Easier, and dedicated app comparisons by iGeeksBlog. Explore FlowPDF's how it works page for more on local processing.
- Fill out forms, sign documents, and create signatures iPhone - Apple Support
- How to Sign a PDF on iPhone - Make Tech Easier
- How to create signature and sign documents on iPhone, iPad or Mac - iGeeksBlog